



How to Boost Your Range with a GMRS Repeater
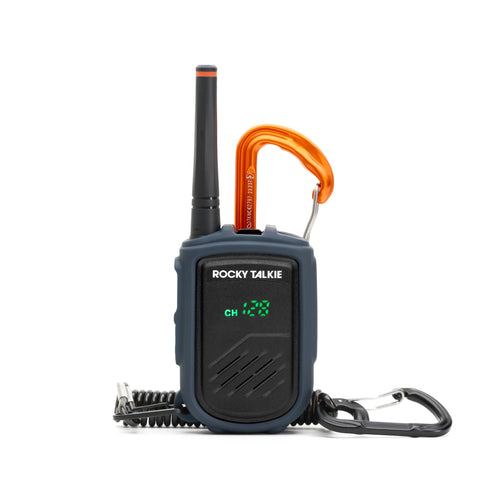
| 6 min read | 2 CommentsThe range of the Rocky Talkie Expedition Radio can reach up to 35 miles in ideal line-of-sight conditions (like peak-to-peak or peak-to-valley), but many of us use radios in more complex terrain. One of the biggest advantages of GMRS radios is access to repeaters, which extend your range when terrain blocks direct radio signals. In this article, we’ll cover everything you need to know to use a GMRS repeater to boost your range, including:
-
What is a repeater?
-
How can I find repeaters in my area?
-
How to Program Your Expedition Radio to a Repeater
Repeater Basics
You can think of a repeater like another radio that retransmits your message to reach other radio users in the area. Repeaters are typically placed at high points, like on an existing tower, hill, or mountain peak, to help overcome terrain obstacles, like a ridgeline or dense urban areas. The illustration below shows how using a repeater can improve your range.

In the left image, with normal radio-to-radio communication, the transmitting radio on the ground can only connect with radios that have a clear line of sight. In the image on the right, you'll see how accessing a repeater at a high point enables you to overcome the terrain. You’re able to communicate beyond the hill and peak obstructions and make a connection on the other side.
It's important to note that, when using repeaters, you can only communicate with radios that are also using said repeater. You cannot have radio-to-radio communication with radios that are not using the repeater. To reestablish communication with radios not using the repeater, you need to switch back to non-repeater channels. It's also worth keeping in mind that your radio still needs to be within range of the repeater itself to make initial contact, so while a repeater can substantially boost your coverage, placement and proximity to the repeater still matter.
So let’s say you purchased a couple of GMRS radios for use in an urban area for emergency situations. Your friend lives five miles across town, and you can’t reach them on the standard 22 channels due to the urban interference. Repeater functionality sounds like a great fit for your use, so how do you find one and use it?
How to Find a GMRS Repeater
Repeaters are usually installed by individuals or groups of radio aficionados who allow public access to their systems. Resources like mygmrs.com are a great place to start, as there’s a handy map feature that allows you to search all over the United States. Before you start searching, you’ll need to create a free account using your Call Sign; otherwise, you won’t be able to view the info needed to program your radio.
Pro Tip: The Expedition Radio, or any other model of GMRS radio, can only use GMRS repeaters. There are other types of repeaters out there that use a totally different set of frequencies, so it’s important to verify you’re looking at a GMRS repeater. The standard GMRS frequency pairings are shown below (also listed in the Rocky Talkie User Manual) and are preset on the radio.

How to Program Your Expedition Radio to a Repeater
Just because your Rocky Talkie Expedition Radio is repeater-capable does not mean that it will automatically pick up and use repeaters. This is a manual process that takes some advanced planning to use effectively.
For this, you’ll need access to the Rocky Talkie Expedition Radio User Manual and the repeater information for your local repeater. We’ll be using a sample repeater taken from mygmrs.com.
Step 1: Activate Repeater Channels
Repeater channels are hidden by default, so you'll need to enable them.
- Start with the radio OFF.
-
Press and hold the Volume Minus (-) and Power Buttons while powering on your radio.


-
Repeater channels are now enabled and can be seen by scrolling past the first 22 channels. These channels are indicated by the REP icon on the screen.

- Repeat the steps to hide repeater channels.
Step 2: Gather Repeater Information
Once you’ve found a repeater in your area using mygmrs.com, click on it to pull up detailed info on its approximate coverage range, frequency, and input/output tones. For first-time users, we strongly recommend writing this info down before you start programming the radio, as it can be tricky to go back and forth between resources.
In the example below, the Cougar Mountain repeater uses a frequency of 462.625 MHz, so we’ll need to find the corresponding repeater channel in the user manual.

On page 28 of the manual, you’ll see that this equates to REP Channel 18.
Note: GMRS repeaters use a standard 5 MHz offset from the RX Frequency to establish the TX Frequency, as shown in the chart below. These are preset on the radio, so no additional steps are needed.

Next, we need to do the same thing for the input and output tones. Below, you’ll see that the repeater uses the same tone for each, at 141.3 Hz. In this case, the tones are the same, but they can also be two different numbers. These can be listed in Hz or DCS; functionally, they serve the same purpose.
Here's a handy way to keep things straight if the tones are different:
- Repeater Input Tone = Radio TR (Transmit)
-
Repeater Output Tone = Radio RE (Receive)

On page 32 of the user manual, you’ll see that 141.3 Hz equates to Privacy Code 22.

So in summary, the Cougar Mountain repeater will need to be programmed to REP Channel 18 with a Privacy Code 22 for both the transmit and receive tones. The remaining steps of the guide will show you how to input those settings directly into your radio.
Step 3: Set the Repeater Channel
Using the Channel Flipper at the top of your radio, scroll forward or backward past the standard 22 channels to access the specific REP channels. If you do not see REP channels, then they are hidden. Repeat step 1 to activate them.
For our example, we’ll navigate over to REP Channel 18.
Step 4: Set the Receive/Transmit Tones and Bandwidth
-
Press and hold the Volume Minus (-) button for 2 seconds.

-
The LED screen will display “RE” and begin to flash, indicating you’re in edit mode. Use the Channel Flipper to set the receiving Privacy Code to 22.

-
Press the Push-To-Talk (PTT) Button to save and continue.

-
The screen will display “TR” and continue flashing. Use the Channel Flipper to select the transmitting Privacy Code to 22.

- Press the PTT Button to save and continue.

- Use the Channel Flipper to select the “W” for Wideband Mode.

- Press any button to save.
Pro Tip: If at any point you think you’ve accidentally skipped or missed a step, or if your screen is no longer flashing, indicating edit mode, simply start over with step 4.
Call Signs
Unlike an FRS radio, the FCC requires GMRS radio users to apply for a license for legal operation. Once approved, the FCC will issue you a call sign, which will serve as your unique identifier when communicating via repeaters to keep things clear on the air.
There’s no test required for a GMRS license, and a simple $35 fee covers you and your family for 10 years of operation. It’s important to note that the license covers the user, not the radio itself, so you can apply before purchasing your radio. To help with this, we have a step-by-step guide here to help you navigate the FCC’s website.
Pro Tip: Because repeaters are generally open to public use, there could be any number of “Johns” or “Sarahs” on the air at one time. Your call sign helps avoid confusion. You do not need to use your call sign when transmitting on the standard 22 simple channels.
Final Thoughts
While a repeater can extend your usable range by quite a bit, your radio still has to be able to hit the repeater to make initial contact. If you’re too far away from the repeater, or if you have significant obstructions between your radio and the repeater, you may need to reposition yourself or find a closer option.
This is meant to be a basic introduction for folks new to GMRS radios and repeater functionality. If you have more advanced questions or curiosities not covered here, feel free to drop us a line anytime!
2 Responses
Leave a comment (all fields required)
Comments will be approved before showing up.
William Tincher
|
May 21, 26
Richard Kell
|
May 15, 26